Copyright © canonmcameras 2011-2020 • All Rights Reserved
To do: Add in link to a page about what camera to buy. In the editing page, add in guidelines about B roll, how long to show it. Include more info on subtitling and how long to show it, font size, color, outline, production issues regarding even color talent and bg so font can be one color etc. In Spoken History – Common mistakes section, talent doesn’t say dates so we have no idea what time in history they are talking about. Normalize audio. BG music level too high, Explain how to choose and when to use music and why. Add links of iMovie how to videos. Some students are using the same B roll twice, use it only once.
Version 7.1.16 – Added in iPhone info.
Here are step by step directions for making a good video with a Canon DSLR. You can use Nikon or mirrorless camera like a Panasonic or Canon M3, M5. I would recommend to initially start shooting with an iPhone or other video capable phone before buying a camera.
![]() The iPhone specific information has an iPhone emoji next to it. I used an iPhone 6 with iOS 9.3.2
The iPhone specific information has an iPhone emoji next to it. I used an iPhone 6 with iOS 9.3.2
There are iPhone video apps like MoviePro, Kinematic, FiLMiC Pro, etc but I haven’t used any of them yet. Before you start your interview, charge your iPhone to 100% since if it runs out of battery during the interview you will lose continuity. Have the charger nearby. You can also have it plugged into the charger as you are shooting.
Always shoot in High Definition (HD). 1080/24P is the standard we use. 24fps is what film is shot at. Audio should be set to 44.1k Sampling 24bit or higher. iPhone shoots on 1080p at 30fps. Don’t shoot at 60fps. Don’t shoot in 4K if you have a iPhone SE-Iphone 7, 1080p/30 is fine.
Become very familiar with your equipment. This is the Instruction Manual in pdf format for the Canon T3i, Canon T4i, Canon T5i, Canon T6i, Canon 60D, Canon 70D. Read through the manual section on Shooting Movies. Note that each model even in the same brand can have slightly different menus.
In general, this is how you should set your Canon DSLR for video:
For a T3i, set your camera up as follows:
- Set the Control Dial to movie mode
- Set Movie exposure to Auto and AF mode to Live mode ->
- Set Move Rec. size to 1920×1080 24 (the image below shows 30 but set it to 24) 24P is 24 frames per second progressive scanning.
- Set Sound recording to Auto (the picture shows Manual but set it to Auto)


If you are shooting under indoor light and the AWB (automatic white balance) looks off, manually white balance. Take a picture of a blank white piece of paper under the same light as your talent. Go to the menu, select manual white balance, select the picture you shot to use as a reference, and now the white balance should be very accurate. If not, try it again.
Always use a tripod. No viewer wants to see a shaky image so using a tripod is mandatory. Look at the video below:
Example of how NOT to shoot a video
The camera will get heavy after a few minutes. Be sure to turn off any image stabilization feature on your camera when using a tripod.
![]() iPhone users there are iPhone tripod heads available on Amazon for $10. If you plan to shoot B roll without a tripod, they have rigs that make attaching mics, lights, and lenses etc much easier.
iPhone users there are iPhone tripod heads available on Amazon for $10. If you plan to shoot B roll without a tripod, they have rigs that make attaching mics, lights, and lenses etc much easier.
You can get by without a tripod for shots where it is impractical and when you are a very skilled videographer. Look at this video pw: deanza around 7:30. The filmmaker was very skilled with his equipment and the tripod did not fit in the car. Be sure to turn on any image stabilization feature on your camera when shooting freehand.
For the main interview:
Always use the rule of thirds. The rule of thirds is a rule that helps you compose your shot. Basically, don’tput your subject in the center or middle of your frame. Put them in the left or right third of the frame. Look at this picture below that doesn’tuse the rule of thirds and puts the subject right in the middle of the frame.
Please don’tdo this! Compare the video above to the videos below that do use the rule of thirds.
Positioning Talent – Talent should be comfortably sitting down in a stationary chair so no rocking chairs or chairs with wheels or chairs that can rotate. Camera is 8-12 feet away and is a few inches higher than your talent’s nose. The talent should also turn slightly toward the direction they are looking. When interviewing people, if you put them in the left side of the frame, have them look to your right. If you place them in the right side of the frame, have them look to your left. Have a friend of the talent sit to the side of the camera that talent is turned towards so she can look at them while she is talking. Make sure the friend is at the same height as the talent. If you interview more than one person, alternate their left and right positioning see Natalie
and Professor Takaki videos for an example.
Tu Nguyen Cam Vo’s spoken history is another example.
![]() iPhone There should be grid lines on your screen that assist you with using the rule of thirds.
iPhone There should be grid lines on your screen that assist you with using the rule of thirds.
Camera to subject distance: The camera should be about 8-12 feet from the talent. Zoom in so the talent looks something like Natalie in this video https://vimeo.com/23892311 If you are using an iPhone, then don’t worry about this, just move the phone so that the composition looks similar to https://vimeo.com/23892311
![]()
iPhone In general, don’t use digital zoom since the image quality can degrade. Just shoot at the default focal length. You can experiment if you want and if the image quality is good enough after zooming then you can use that footage.
Camera height should be a few inches higher than the nose of your talent.
This video of Natalieis very good. Note the use of a tripod, lavalier mic, the rule of thirds, lack of background noise, proper camera to subject distance, and natural indirect light.
Focusing – For DSLRs, it’s best to manually focus. For the T3i, T4i, T5i and 60D put the camera into Video Mode. Select MF from the AF/MF selector switch on the lens. Press the magnifying glass with the + in the middle twice to zoom in 10 times. The 70D and 80D have much better AF. You can auto focus but it may focus on the background so pay attention.
![]()
iPhone You can touch the persons face on your screen so the yellow focusing box will focus be around it and the iPhone will focus on whatever is inside that yellow box.

Focus. Press the button again for normal view. This works when the subject is not moving around. If the subject is moving, try to keep them the same distance from the camera and set the lens to that distance. Look at the green foot marks on the lens and set it appropriately. I used this technique when shooting this deer at Point Lobos.
![]()
iPhone Don’t use digital zoom. Just shoot at the default focal length so distance from iPhone to talent is about 18″-24″
Lighting: Don’t shoot at night. It’s best to shoot during the day and use natural indirect sunlight to light your shot like the shot above. White balance for sunlight. If you are shooting in the shadows balance for shadows. The entire shot should be lit by the same light. Don’t mix dark shadows and bright sunlight in the same shot like the video below. Make sure the light source is in front of your talent and not behind. Avoid backlighting your talent whenever possible.
Use a Lavalier Microphone for interviews. Lavalier Microphones produce excellent sound, listen to the videos above and notice how clear and crisp their voice is. Use these mics if you are doing interviews. They only cost $20! Built in on camera mics are usually not very good. Have the talent put the lav mic up through their shirt and then clip it. Demonstrate how to do this on yourself. If you can hide it like I did for the video above that would be best. The wire from the mic should not be visible to the audience. In the videos above, Natalie has a hidden mic, but Professor Takaki’s mic is visible. Make sure to hide it!
Make sure to turn the mic on before the interview and off after since the battery will run down. It’s a good idea to have an extra battery. Note that lav mics are mono so sound will only be on one channel.

Inform your talent not to touch their shirt anywhere near the mic since it will pick up noise from brushing near it. Plug the mic into the mic input on your camcorder. Most, but not all camcorders have a mic input.
In general, the auto record level works fine, but if it doesn’t you will have to adjust the sound level manually to about -6db on the meter if you have one on your camcorder. Most camcorders don’t allow you to adjust the record level manually nor do they have record level meters. Be sure to shoot 30 seconds of test footage, play it back, and make sure it looks and sounds fine before doing a long interview.
For shooting where a lav mic is impractical, use a shotgun mic. If you will be outside, use a foam windscreen and a dead cat wind shield. If you use an on camera mic, this is what the sound will sound like when the wind hits the mic. Listen around 30-60 seconds of this clip of a deer I filmed at Point Lobos. Rode brand mics are quite good. The Rode VideoMicro is small, $59, and includes a windshield. It’s not expensive, works well, and isn’t too big like other mics. I use one on my Canon M3.
![]()
iPhone If you want to spend money, search for smart lav on Amazon and buy one of those with good reviews. For a directional mic, the VideoMic Me is $59 and includes a windshield. I haven’t tried it personally but have used other Rode products and they are all very good. Note, plugging a Lav mic into the headphone jack doesn’t work. You’ll need an Irig. I tried out a $9 Irig from eBay and it was worthless. The record level is so low that the audio cannot be heard. Just use the built in mic.
Eliminate background noise. Just as important as using a lavalier mic is to eliminate any background noise. Interview your talent in the quietest place possible since the mic will pick up all kinds of noise even if you aren’t aware of it. The De Anza cafeteria would be a very bad idea. Even outside the library is too noisy since a mic will pick up the noise from the fountain. Inside a group study room in the library or some other quiet place is best. There should be no conversations or children or pets running around the room while you’re shooting. A mic will even pic up the refrigerator coming on if you are shooting a kitchen scene.
Make sure all phones are turned off. Even texting rings and vibrating will be picked up by a camera mic. Turn to airplane mode, do not disturb, or off.
Shooting outside presents problems such as barking dogs, airplane noise, car noise, people talking, car alarms, wind noise on the mic, construction noise, animals like birds, etc all impacting clean sound. The lighting can also change as clouds may cover and uncover the bright sun.
Watch your background. Notice how the video below has a bright window in the background? Bright lights, windows, or clutter should be avoided. When possible use a background that makes sense. If the talent is discussing cooking, have a kitchen in the background, if they are a professor, have a bookshelf full of books in the background.
Yesenia’s Spoken History from Ethan Lee on Vimeo.
Directions for videographer/interviewer – Brief your talent on what you want them to talk about and address rather than asking a question and having them answer. The Q&A format doesn’t work as well as the talent just speaking to your topic and addressing your questions. The two videos above have the talent just talking about their lives with no questions prompted by the film maker. If your talent is donating their time, you should take them to lunch or coffee or something to show your appreciation.
Interviewing – See the Spoken History page for interview instructions
Directions to give to talent – Tell your talent to never look at the camera. Tell them to speak in a normal voice in terms of speed and volume. If your talent needs a break, just give them a break. Don’t expect to get everything perfect in one take or attempt. You may need to make multiple takes. Tell them how to improve each take. “That was great, but can you speak to how these stereotypes impact your life a little more?” It’s important to encourage and not just tell them what you think they are doing wrong.
Things to avoid – Tell the talent not to wear stripes or a shirt with a grid on it. This is to prevent moire patterns. This is an explanation of moire patterns. Look above at the Prof Takakiinterview and you can see the moire pattern on his shirt. It’s distracting. Also, avoid shirts with a big logo on it like Old Navy or Nike etc. Avoid having them sit in a rocking chair. No pets or any other props that your talent could be playing with, a pen, cell phone, iPad, iPod, PSP etc. If they wear glasses, ask them to take them off since glasses can reflect light and be very distracting.
If you plan on subtitling, make sure that the background and talent is color consistent so if you use subtitles they will stand out. So everything – clothing, background is light so black text will be easy to see, or everything mid to dark so white subtitles will stand out. See the example below. The white background forced the editor to line wrap the subtitles

Release forms – If you are interviewing people for your video, especially people you don’t know who aren’t in your immediate family, you should have them read and sign this releaseform.doc. Change every occurance of Ethan Lee to your name.
Pictures and B roll – Make sure to shoot B roll and include pictures where appropriate of what your talent is talking about. This is critical to having a successful video. B roll is the supplemental or alternate footage intercut with the main shot in an interview or documentary.
For examples of past class projects, see http://vimeo.com/spokenhistory
Screening – In the credits have a line: Public Screening – Okay, or No Public Screening to let me know if I can show it to the class or not. When you screen your video for the class, you can set it up with an intro, or just screen it and talk about it after answering questions from the class. You can also talk about what you learned doing the project. Whatever you do, please don’t talk about how your video would have been better if the battery didn’t die, if I would have had more time, if it didn’t rain, if my interviewee was better, etc, etc. Don’t make excuses during your screening and discussion.
Resources for information
- Canon Digital Learning Center
- Canon Forum
- Nikon Cinema
- Outdoor videography! Here’s Yosemite.
Which camera should I buy?
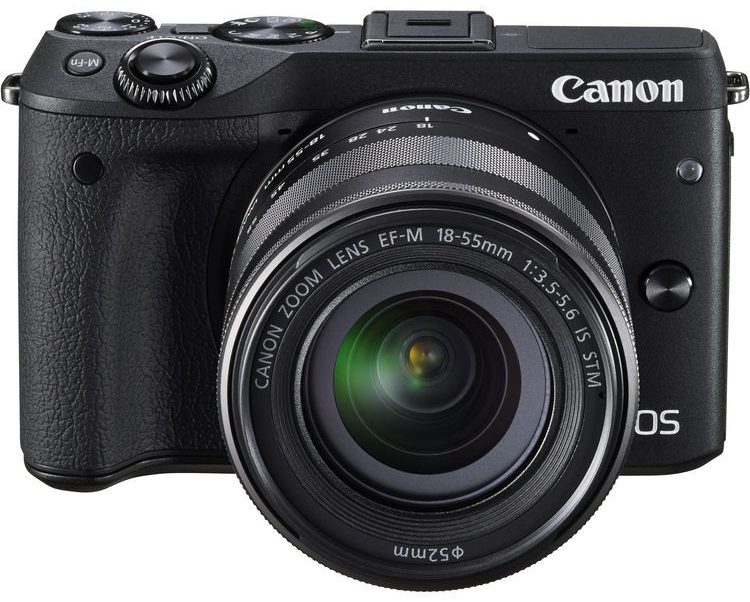
If you want to do more than an iPhone with a video app, either a Nikon, Canon, or Panasonic DSLR will do fine. I usually buy my DSLR cameras refurbished directly from Canon. I would recommend the T3i, T4i, T5i, or T6i. If you can afford an 80D or 70D, they have the best autofocus for video. I’ve had good luck with the Canon 17-85 lens. You can buy them on craigslist for around $150-$200. Another outstanding DSLM for video is the Panasonic Lumix GH4. You can also buy a camcorders though the image quality of DSLRs and Mirrorless cameras is much better. DSLRs can be difficult to autofocus quickly since the autofocus technology for video is not as good as the AF for still photography. However, in 2016 you can buy a Canon 70D or 80D which both have much better video AF. A Canon 5DII or 5DIII are also good choices but are expensive. I don’t recommend the Canon 6D for video. Camcorder autofocus technology is much more mature, fast, quiet, and accurate. If you are in a run and gun type of situation, a wedding where the subject is moving constantly then a camcorder is the way to go. Panasonic and Canon make great camcorders. If not, a DSLR will give you outstanding image quality. You can also try out mirrorless cameras. I have a Canon M3 and M6 which work fine for both HD video and stills.
http://www.videomaker.com is one site to look at for info. http://www.dpreview.com is a good resource too.
 SD cards are not created equal! I have had cameras stop recording after 10 seconds because the card could not keep up with the data the camera wanted to write to it. I have had good luck with Class 10 80MB/s cards from Sandisk, but not the Amazon brand. The money you save on a cheaper card doesn’t mean anything when you can’t record on a shoot. 32GB is the smallest I would buy. 80MB/s is the minimum speed. Classes can be confusing. Don’t cheap out on SD cards when shooting video. Questions? Just email me.
Copyright © canonmcameras 2011-2020 • All Rights Reserved
